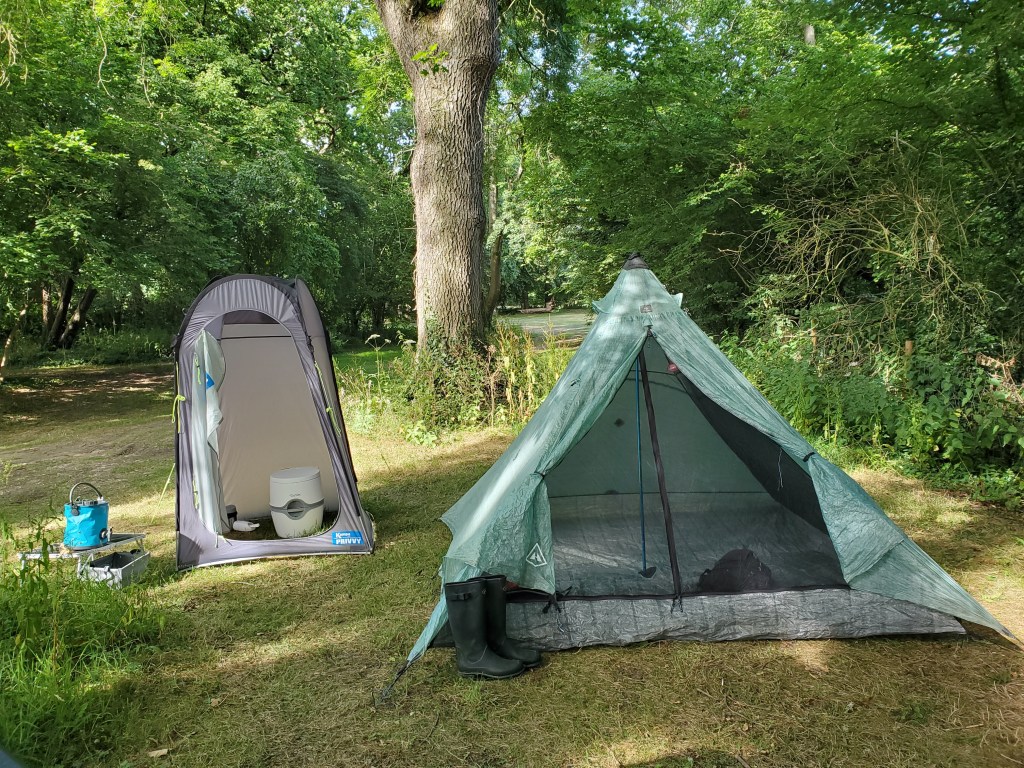
Look what we found… a nice shady spot to camp in a heatwave! We had a lovely couple of nights at Pit Hill Farm – the campsite we stumbled across when walking the Wayfarers walk in Hampshire.
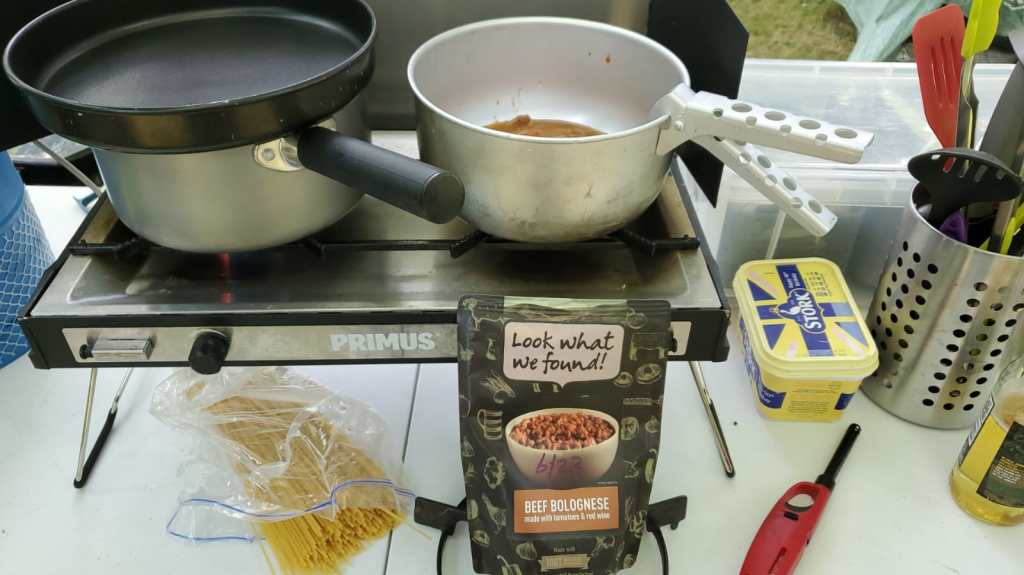
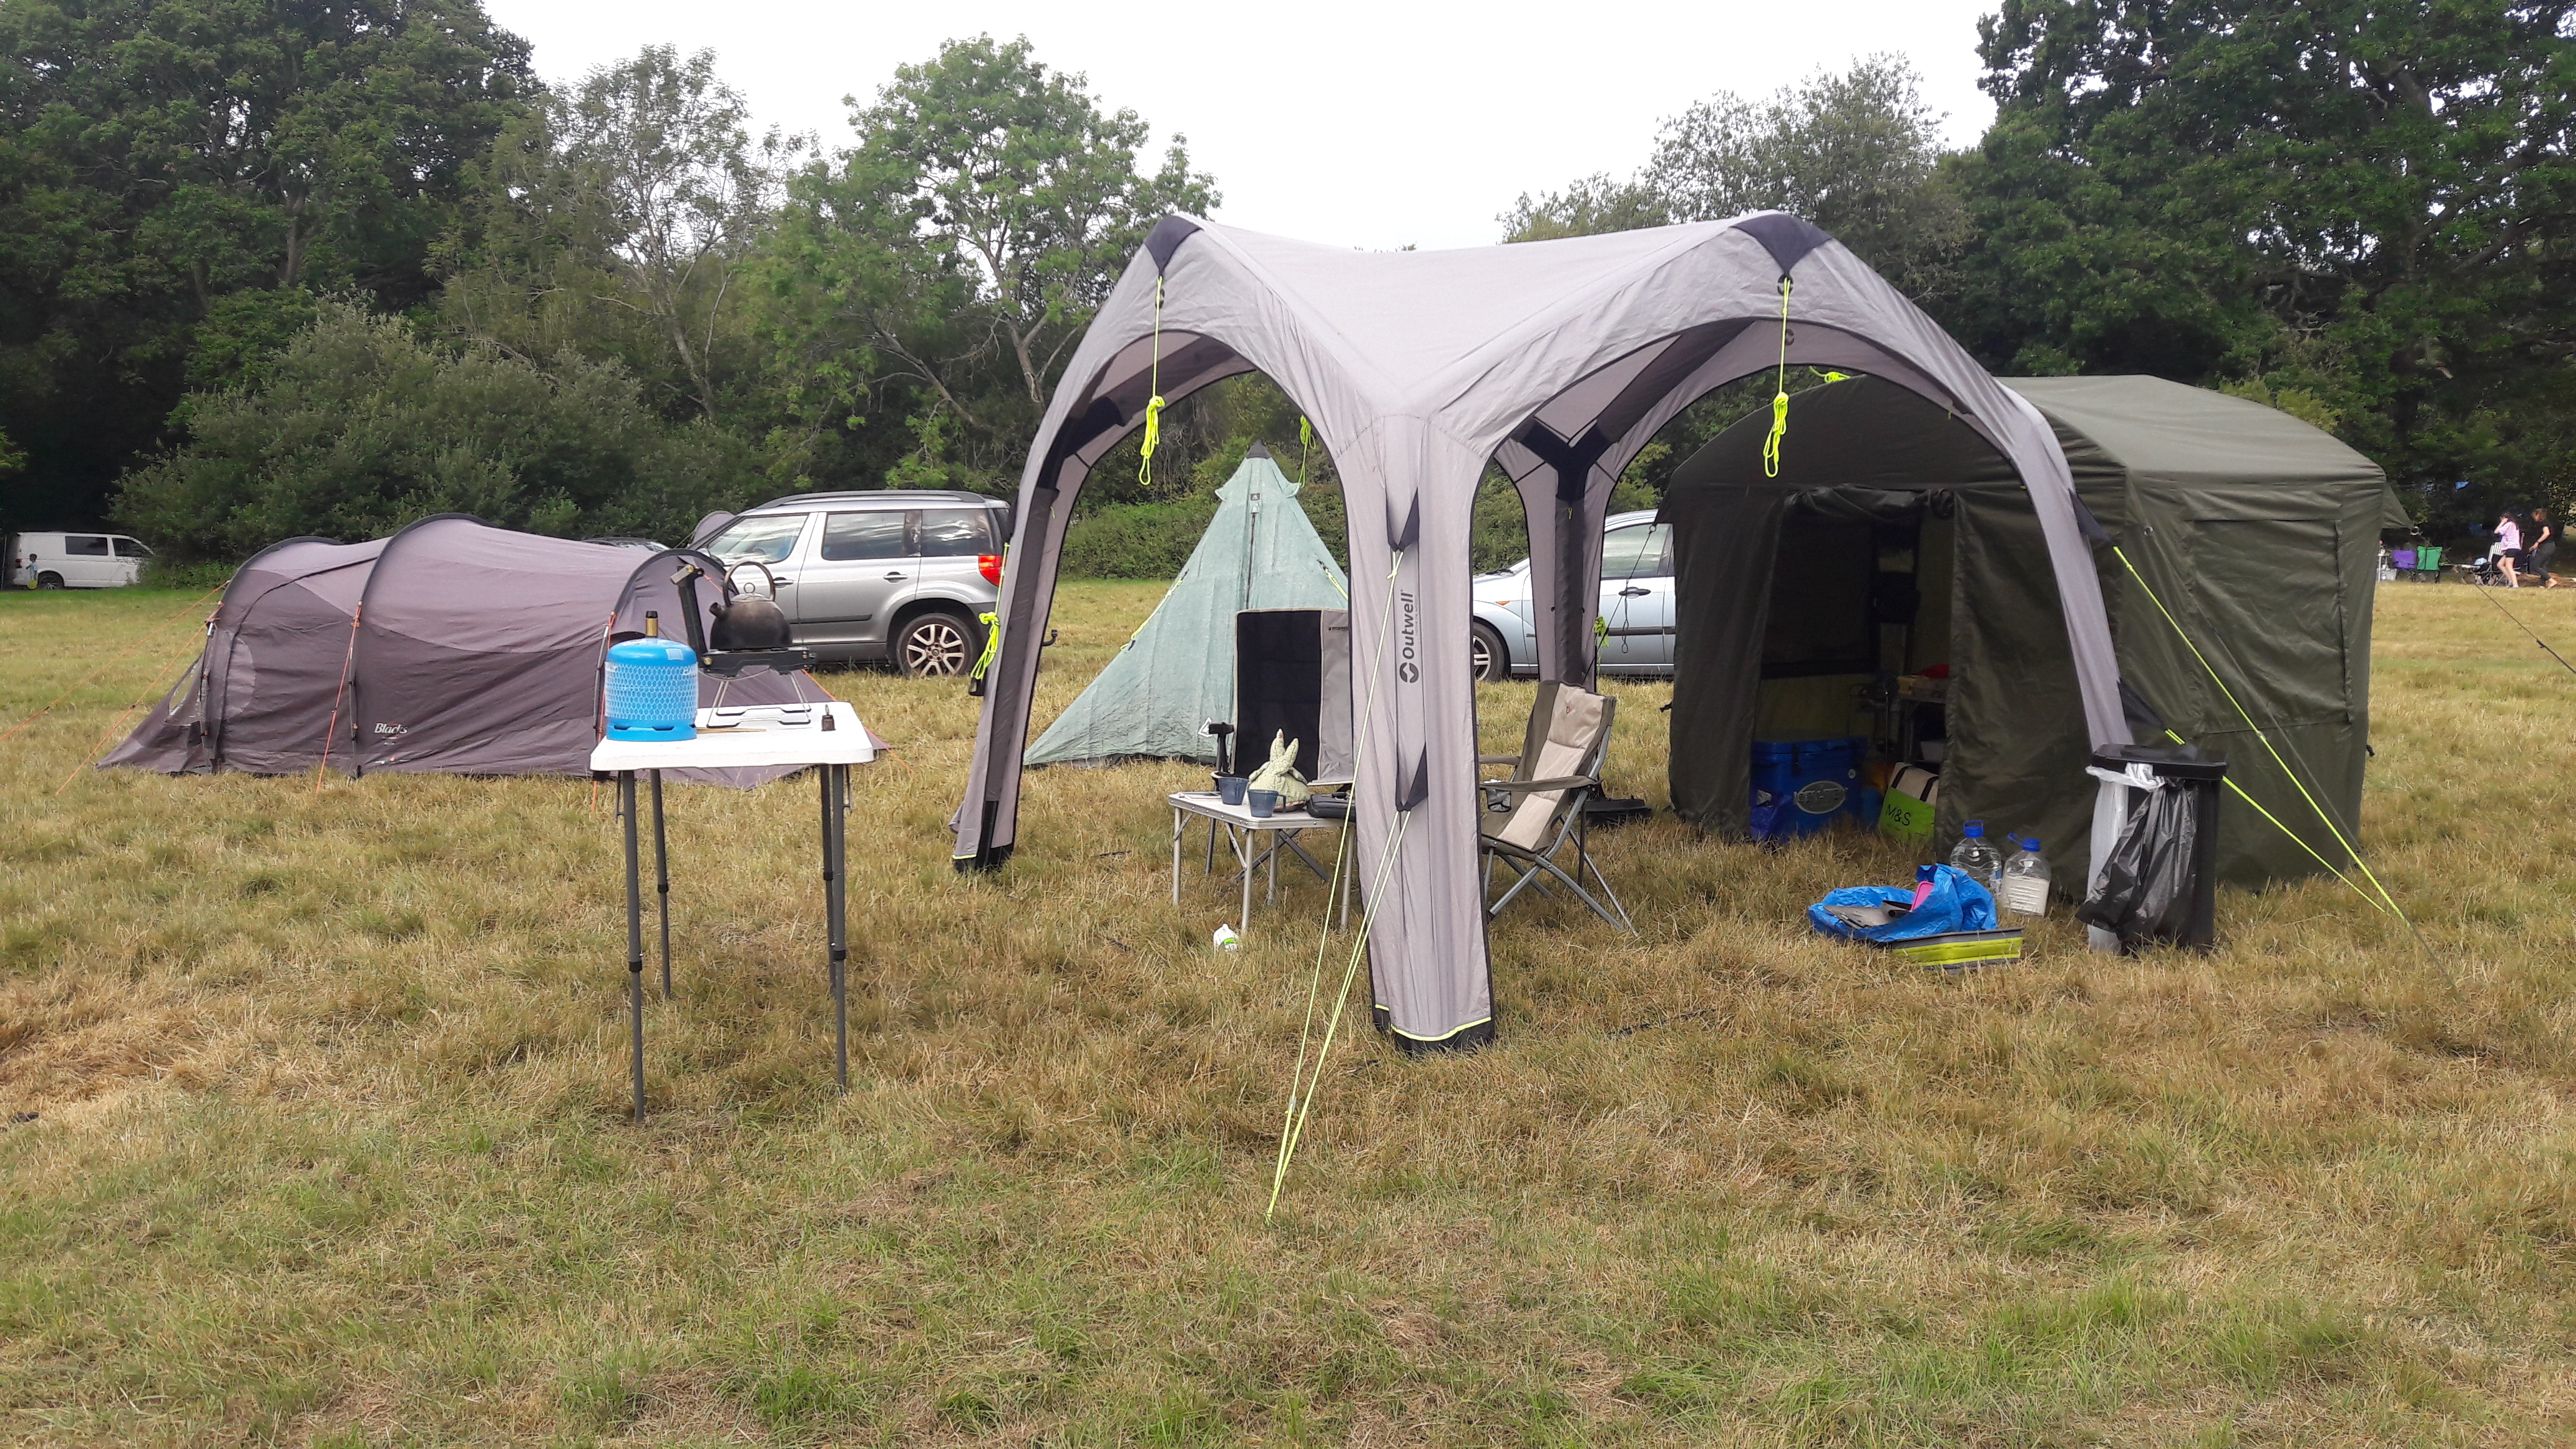
We kept things simple this time. We had a new simpler camp set up to try out (more about that next time!). We also tried out some new easy camping food called ‘Look what we found”!! Very easy to use and tastey too!
We are making progress on our challenge to complete the Wayfarers Walk and in the latest section from Denmead to Fort Widley, we got our first glimpse of the sea!
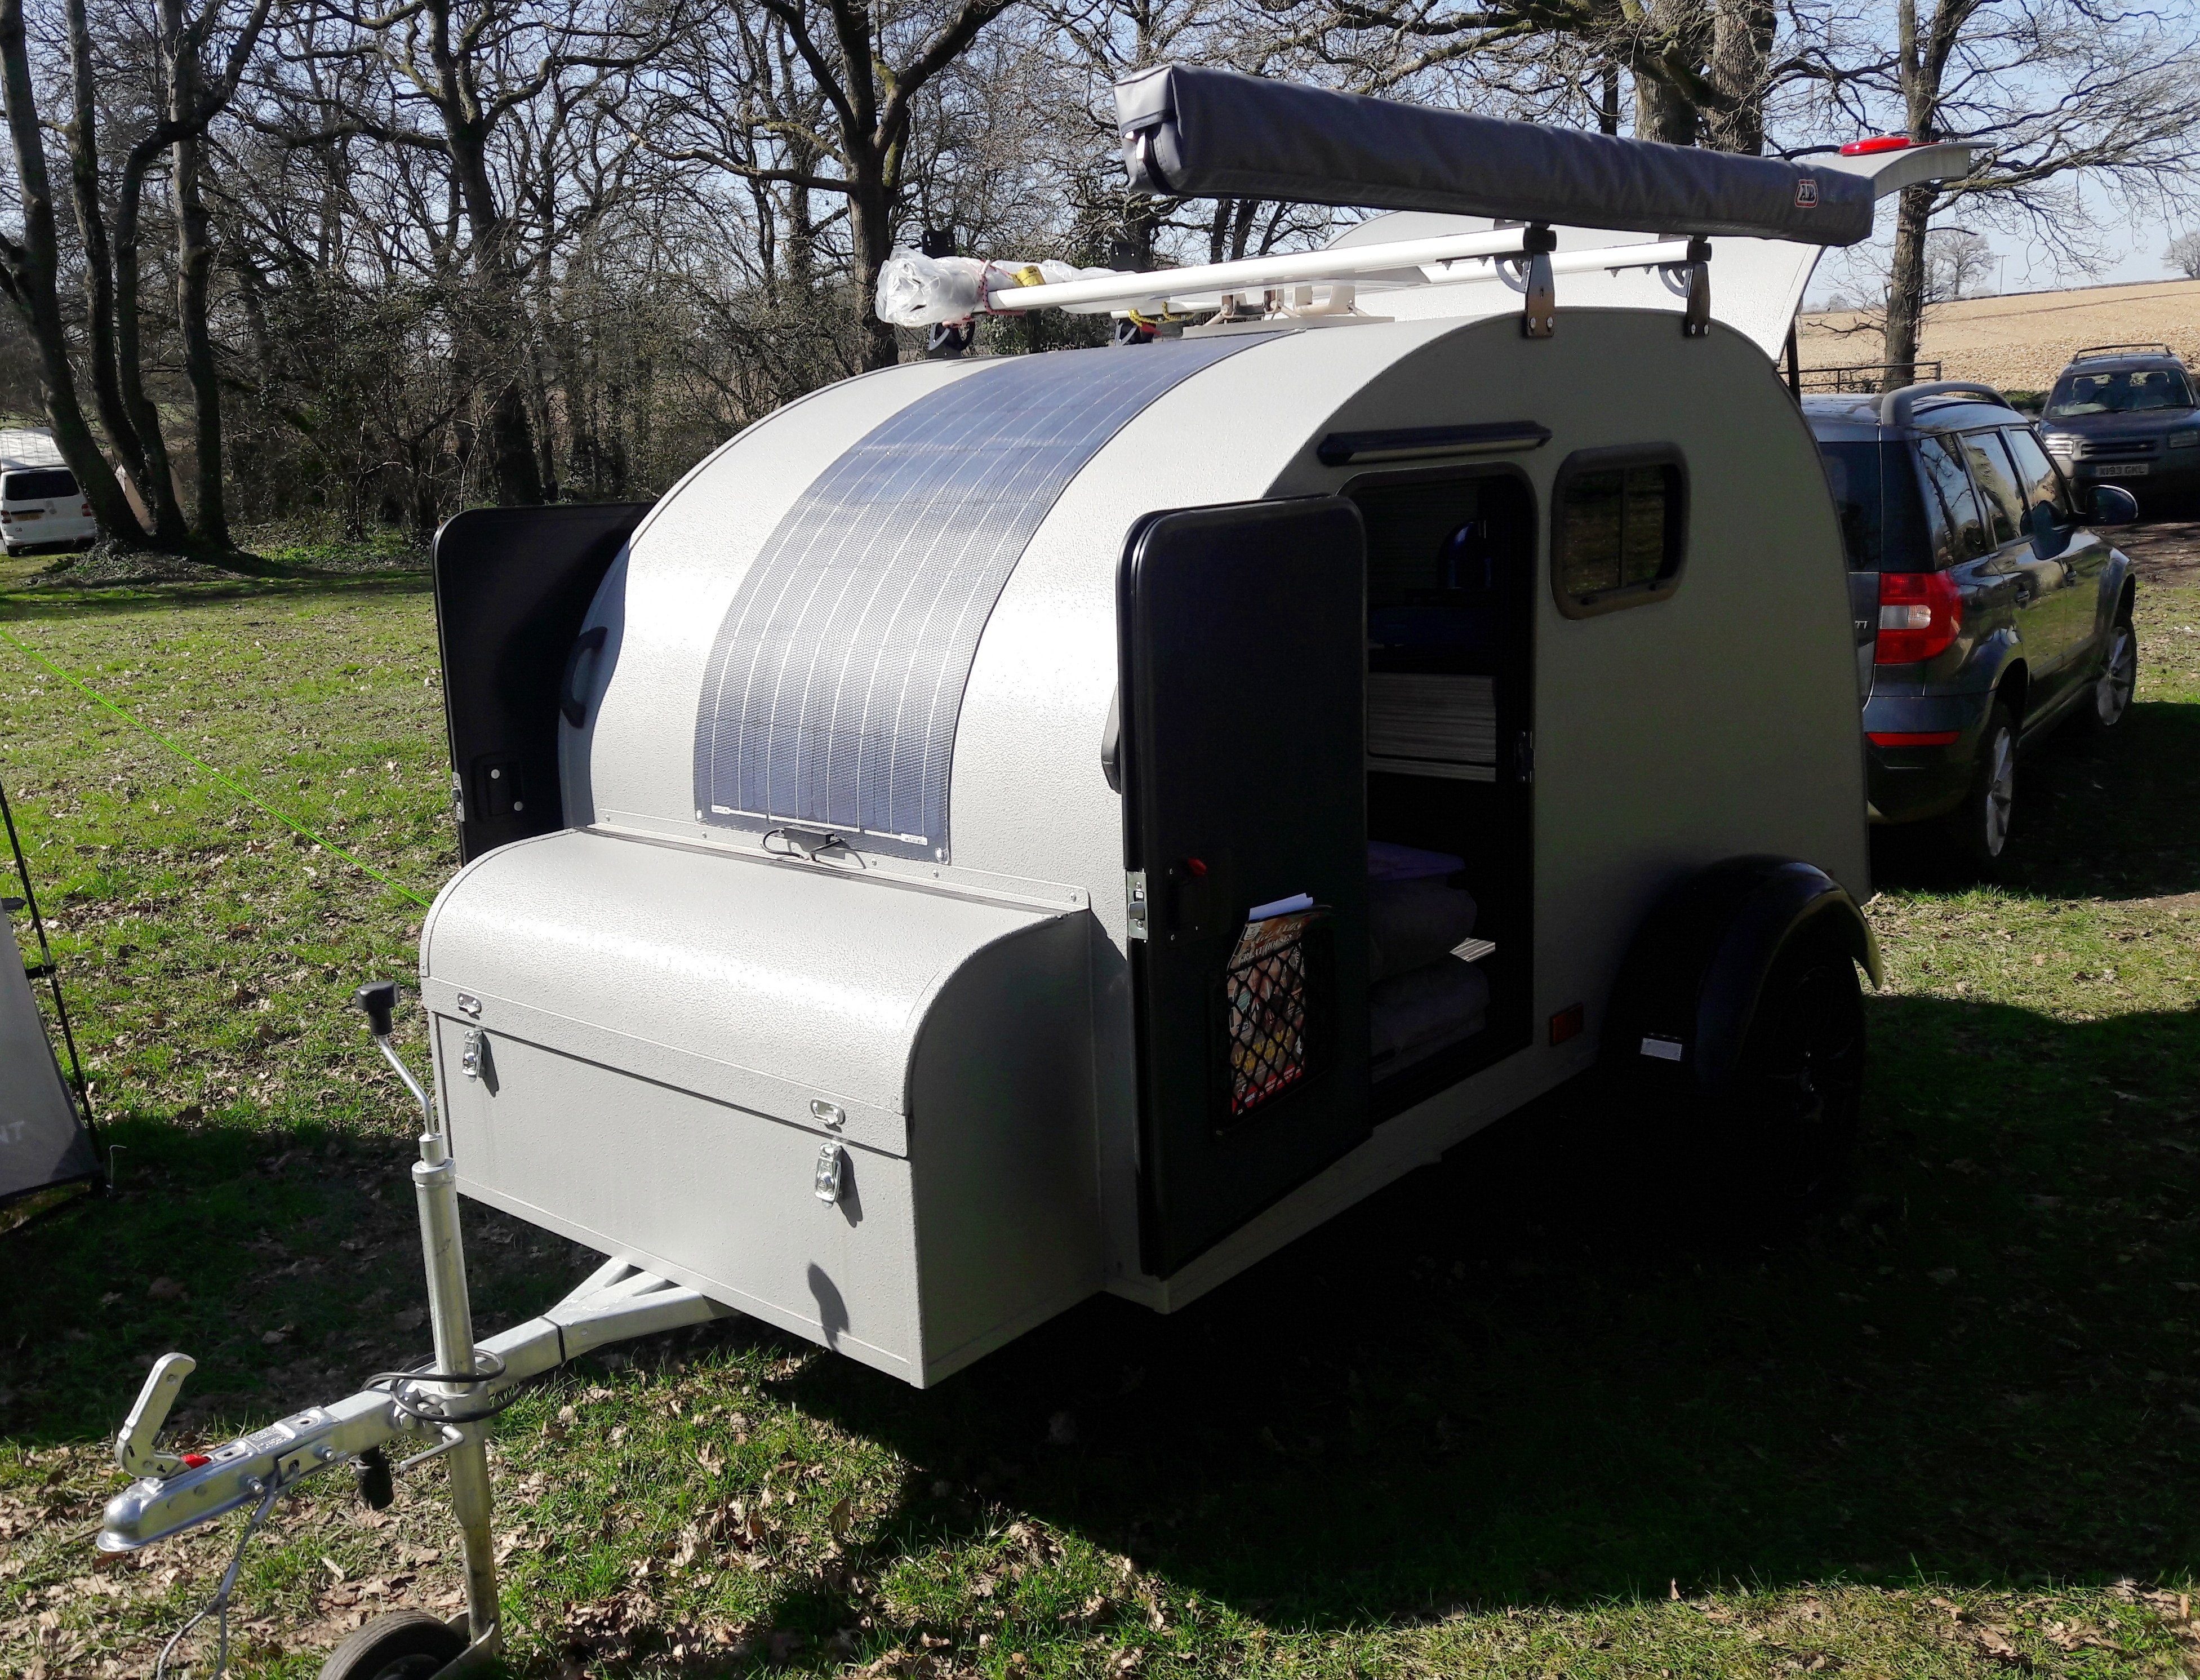
In our last post we mentioned seeing the glint of the tops of campervans at Pit Hill Farm and going to explore. Not only did we find campsite but a friendly farmer who invited us to come and try out the site sometime.
We also found a friendly camper and proud owner of a beautiful new teardrop camper. I’d never seen anything quite like it, so I had to take some photos for you.
So compact and yet everything you need! And stylish with it.
We everso nearly went camping at Pit Hill recently, but a bout of COVID put a rain check on the plans. Hopefully we’ll try it out soon and of course we’ll let you know how we get on.
I think some of you must be thinking that we’ve got lost it’s been so long since we posted an update about the Wayfarers Walk. Rest assured that we haven’t got lost and are still making good progress. Here is the next installment!
We’ve just had a long Bank Holiday in the UK to celebrate the Queen’s Platinum Jubilee. Two days off work seemed like an ideal opportunity to go camping… but a different sort of camping this time. Rather than a jam-packed car load, I managed to pack light:
Normally I only camp in small campsites, but this weekend I stayed in a massive temporary campsite with 36,000 others at the Big Church Festival .
It was great fun – I can’t think the last time I went to a big concert! The weather was very mixed, but Rend Collective and Melissa & Jonathan Helser still sounded great even in the rain!
I haven’t camped at a festival like this before, but as a beginner hear are my tips:
how will you transport your kit? If your car is parked 3 fields away how will you get your stuff to where you are pitching? My big backpack was good for this, but a trolley would have been even better.
where are the toilets? You don’t want to pitch too near the toilets as they might smell and you’ll hear people banging the doors all night. On the other hand you don’t want to have to walk miles to the toilet or to the water tap.
pack emergency loo roll. I didn’t think of this, but fortunately my buddy did. It’s unfortunate if the portaloo runs out of toilet paper just when you need it.
remember a water container. You’ll need something to carry water from the tap back to your tent.
take bin bags. Always handy to have a black bag with you for your rubbish or to double as a waterproof rug when the ground is damp… or your chair has been rained on. Little disposal bags are also handy for a little in-tent dustbin and because portaloos often don’t have bins in them.
remember your waterproofs. I got good use out of my waterproof jacket and also it was handy to be able to wear my waterproof trousers to sit on the damp grass in the morning when cooking and washing up. We also found a big umbrella useful for sitting under at a concert in the rain!!
do you want to be able to sit in comfort? We took our folding chairs and enjoyed being able to sit in comfort at the concert… but maybe you’re more of a raver than me and will be dancing at the front!
always pack emergency food. The first night the food vans let us down – there only seemed to be one open and naturally it had a mile long queue!! Fortunately we’d packed emergency pasta, stir-in sauce, tinned sweetcorn and tinned rice pudding. So we got out the trusty trangia and cooked up some dinner.
collapsible gadgets come into their own in this sort of situation. In the picture above you can see our collapsible washing up bowl doubling as a mini table! It was also very useful for washing up in, along with a tiny bottle of washing up liquid and a sponge scourer that I’d cut in half (to make it smaller & to make me feel less bad about throwing it away afterwards)
a battery pack to enable you to recharge your phone is very handy. Also remember to put your phone on aeroplane mode overnight – I forgot and the poor phone spent all night looking for signal and drained the battery!
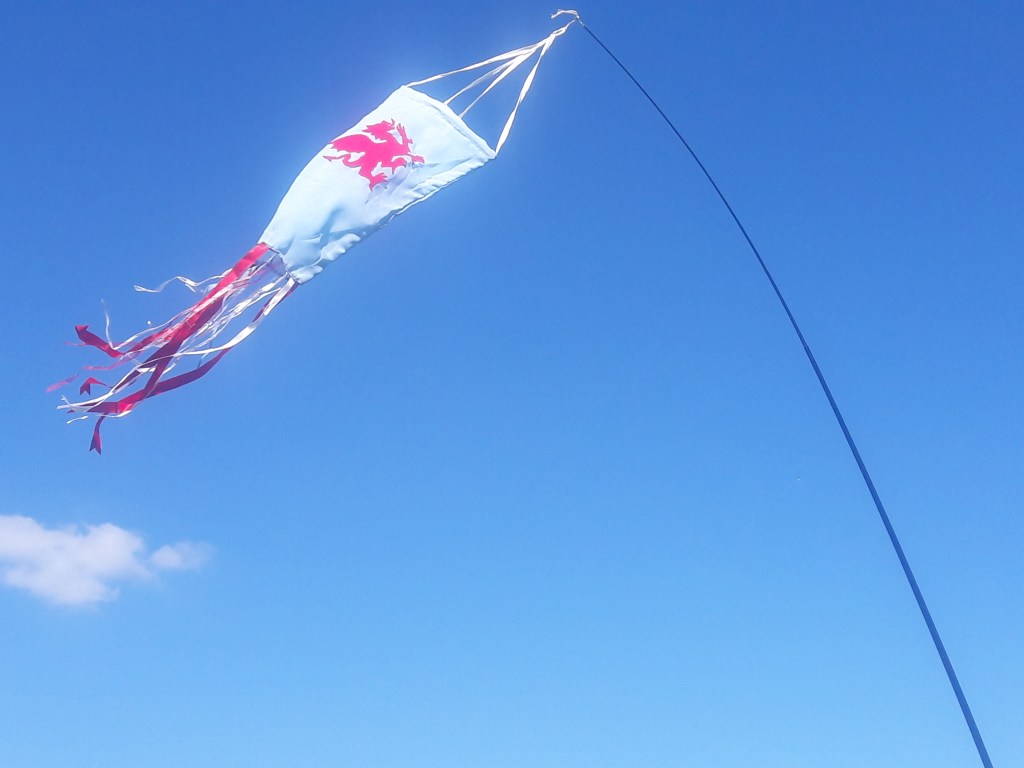
to avoid getting lost take a flag & flag pole, so you can pick your tent out of the vast expanse of tents stretching in all directions!
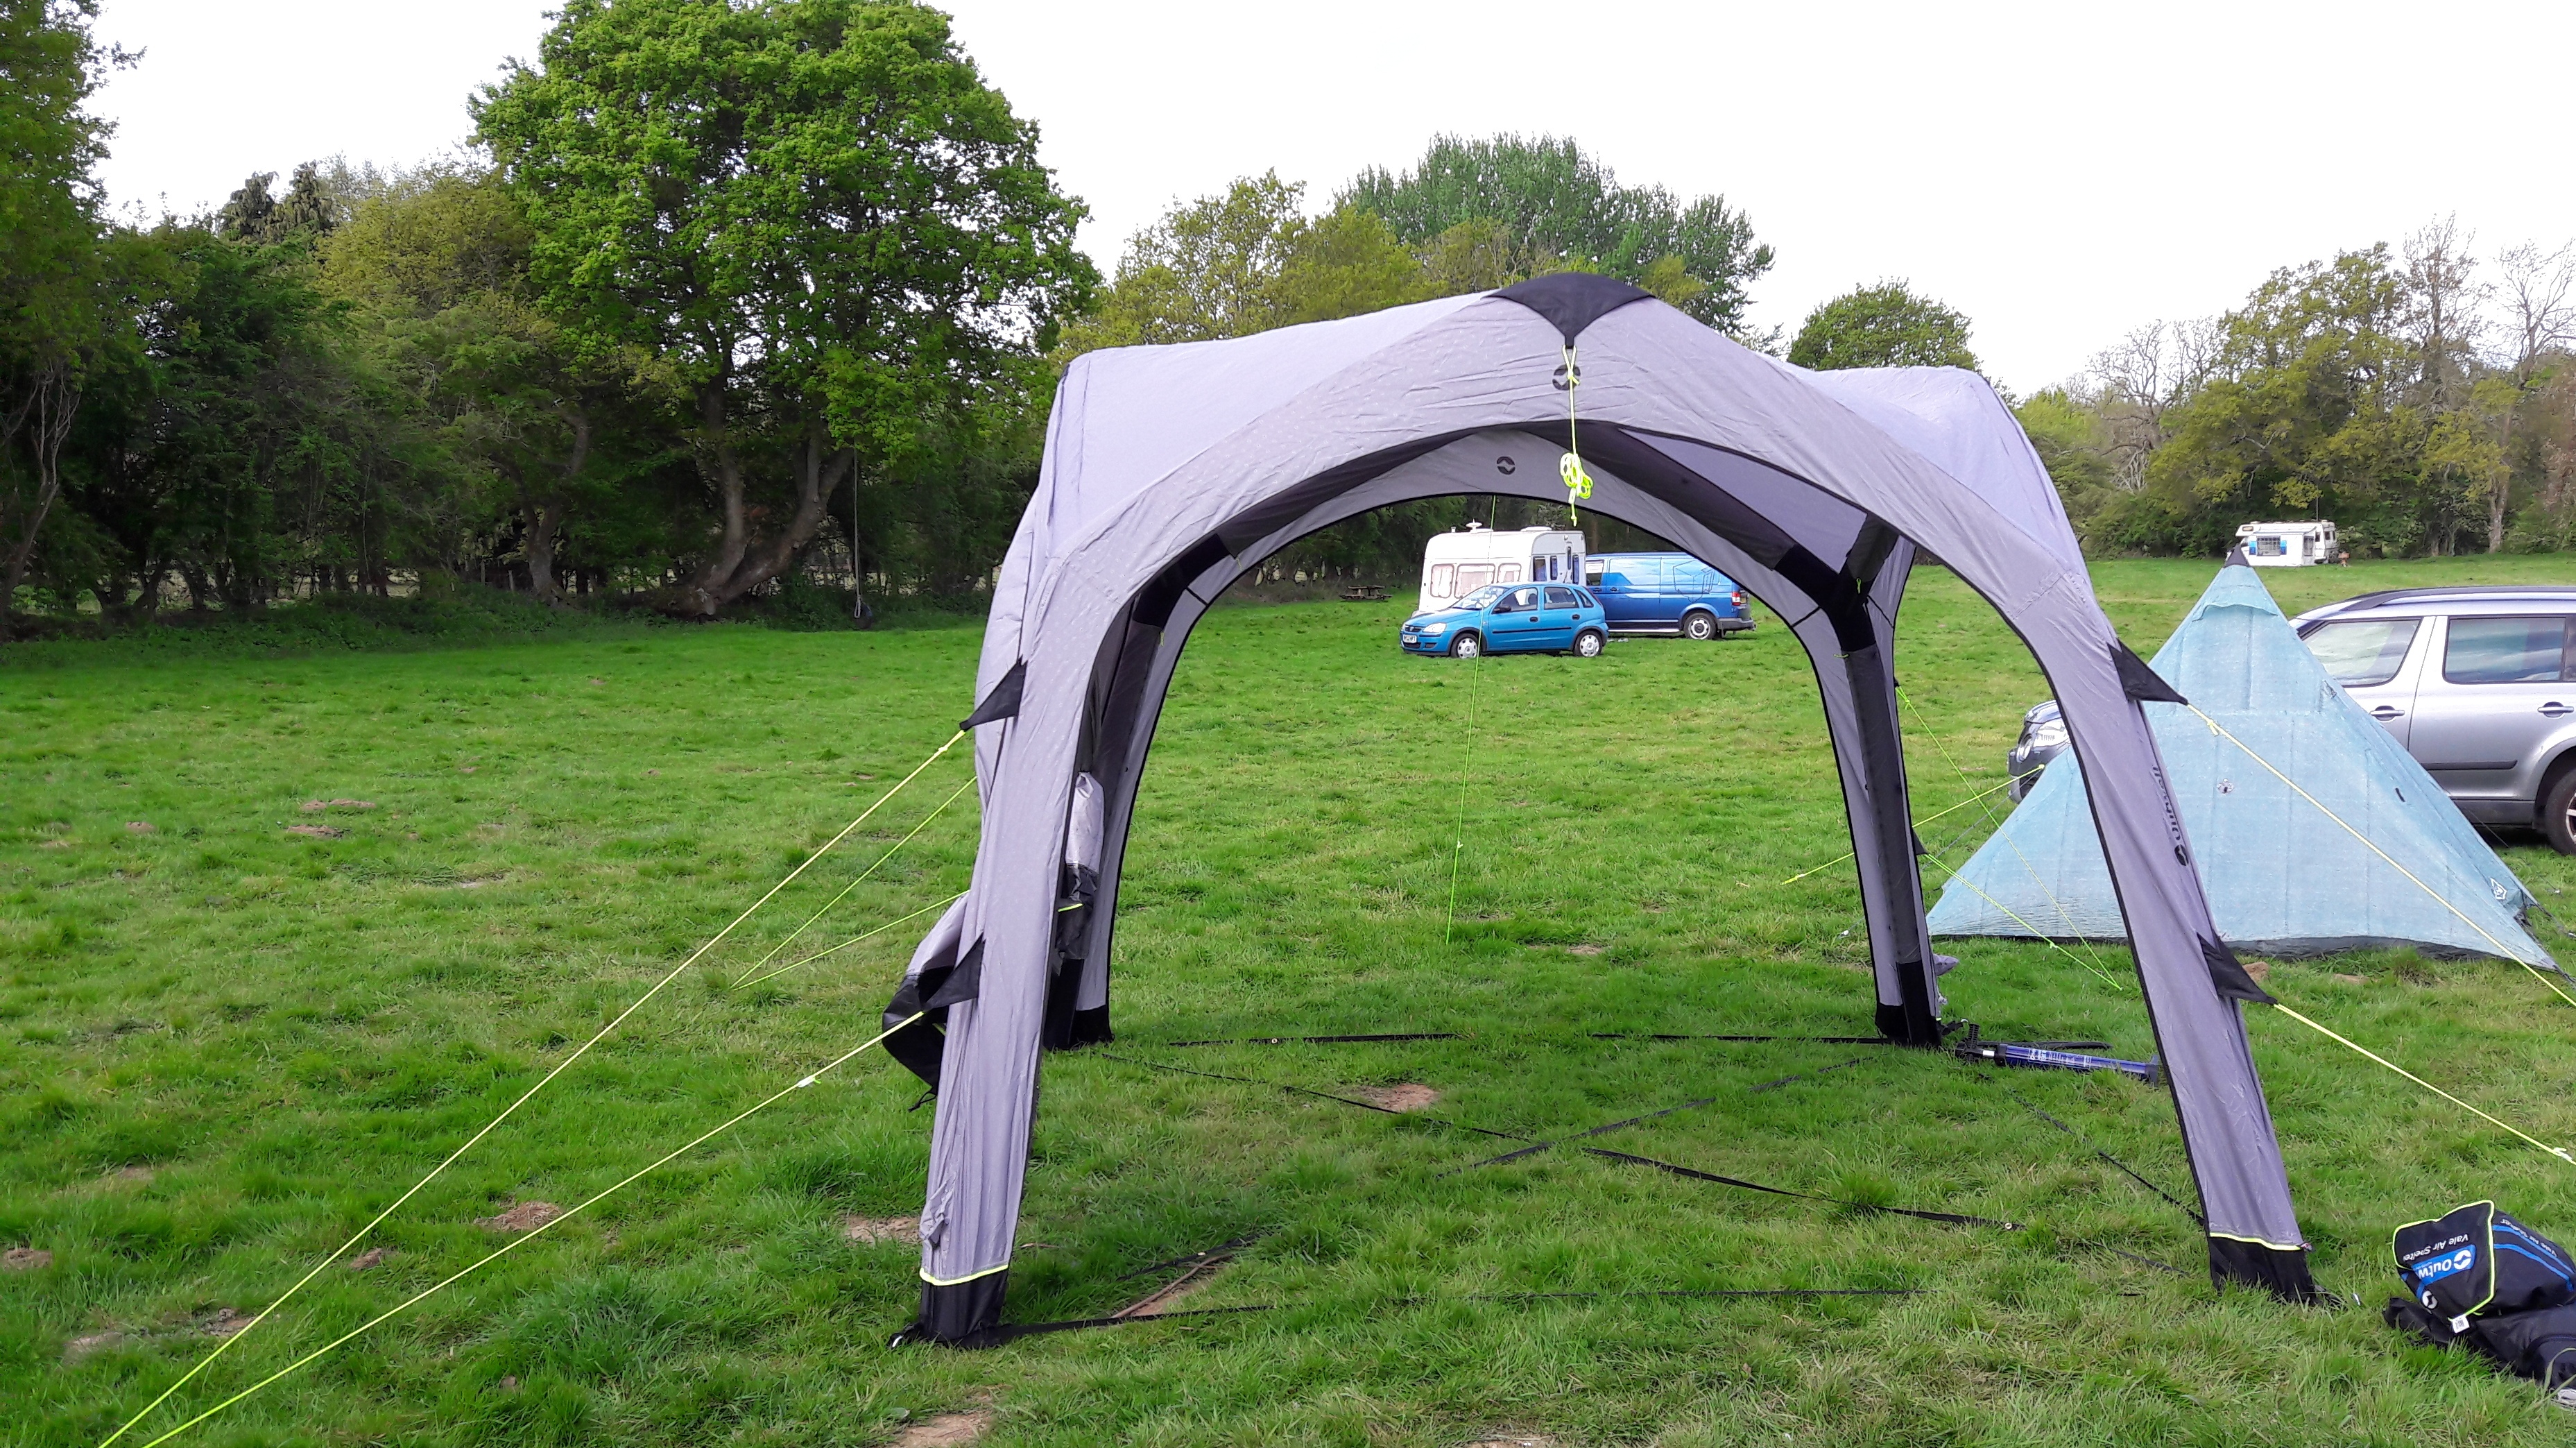
Firstly, don’t panic – Gary isn’t a human! Gary is the name of our gazebo! (Yes, we know we are a bit odd – maybe that’s why we like sleeping in fields when we have perfectly good houses with beds?!).
Gary join our camp equipment family in 2019. You can read about his arrival here. He has worked hard over the last few years – he’s been a sunshade and a rain protector, he’s been battered by the wind at many campsites, been dusted in frost, held puddles of rainwater on his roof and once got weighed down by a pile of hail stones! Over lockdown he put in extra hours turning gardens into outdoor rooms hosting dinners, lunches, tea parties, beers round the fire and even a hen party. Every time he gets bowed down, he bounces right back up – literally! Although we don’t leave him up in high winds unnecessarily, it is fun to watch him be pushed right down by the wind and spring back up a moment later!
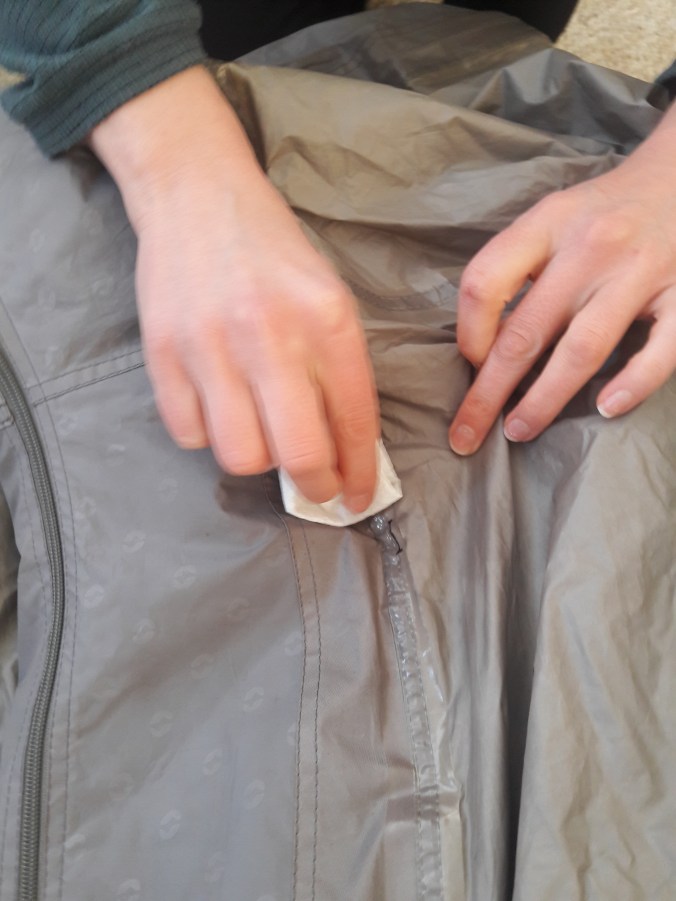
Hard work takes it’s toll and Gary developed a tiny hole along one of his seams. We hope he has many adventures ahead of him this summer, so we wanted to repair it as straight away before it got worse.
Step 1: purchase some ‘seam grip’ and some ‘tenacious tape’
Step 2: working on the inside, clean the affected area with hand-sanitizer
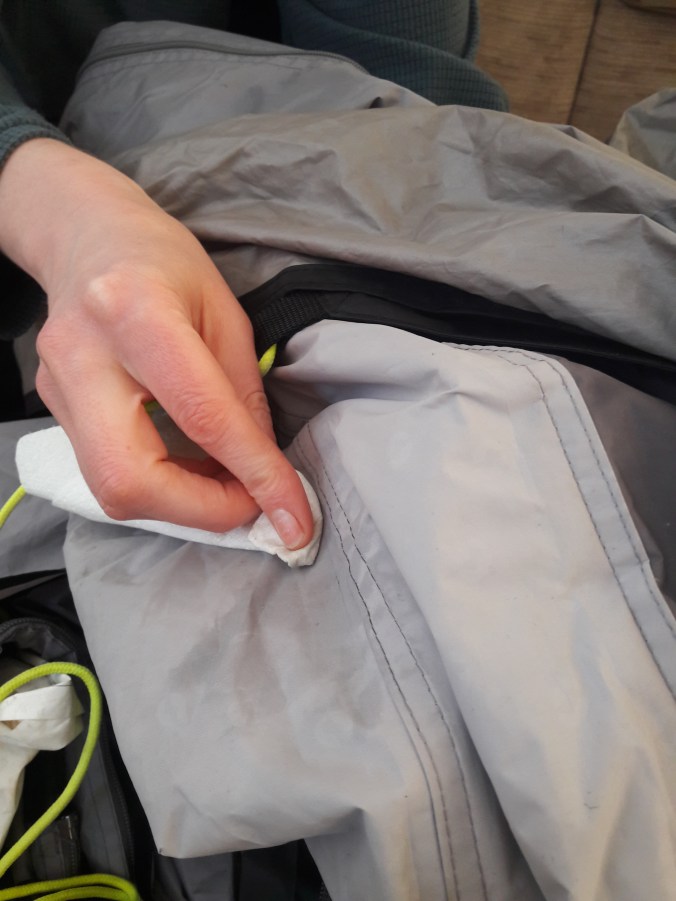
step 3: cut a little strip of tenacious tape, just bigger than the hole. Peel off backing and smooth over hole, pressing down firmly.
step 4: now clean the outside with hand sanitizer.
Step 5: apply seam grip over the hole. Leave it to dry a little bit.
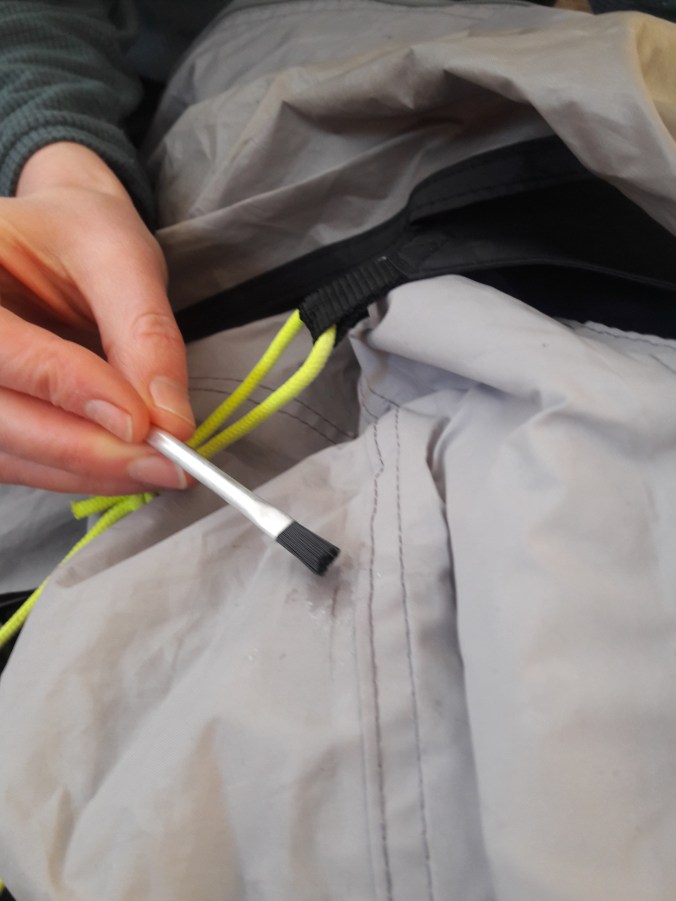
Step 6: cut another strip of tenacious tape and apply on top of the seam grip
Hopefully Gary is now almost as good as new and looking forward to hosting many more adventures!
When we arrived at Stockbridge View recently, not only was the weather cold, it was very windy. We thought it might be helpful to share our tips for pitching in the wind:
choose your location well. We are actually notoriously bad at this, we always want to pitch for the best view – usually the windiest spot on the top of the hill. We are slowly learning that sometimes it is wiser to forego the view and pitch in the shelter of a hedge or wall.
consider your angle. You probably want to try to pitch streamlined, especially if your tent is long and thin. Put the lower bits of the tent into the wind to guide the air over the tent rather than to buffet it. You don’t want to put your door into the wind – if you do the wind will come in when you open the door and lift your tent up like a kite. Pitching with your back to the wind also means that you can sit in your tent doorway and enjoy the shelter of your tent.
where will the fire go? Fires are an essential part of the camping experience, but in the wind you have to be a bit careful. Firstly you need to think about which way the wind will blow the flames. A gust can make the flames lick out quite far. You need to be a safe distance from your tent which is highly flammable! Of course the wind can also make lighting the fire difficult, so locating the firepit down wind of the tent, might make it easier to light as well as making sure the flames blow away from the tent. Bizarrely as well as being hard to light fires in the wind, it is also hard to get them properly out. A strong wind during the night can relight embers that looked like they were dying. In windy conditions knocking a fire out isn’t enough, always add water too.
make full use of guys. Sometimes it’s tempting not to use all the peg holes and guy ropes, but in the wind you really need to. Your tent was probably designed to withstand a bit of wind, but they were assuming you put it up as per the instructions! Guy ropes should be pegged out and then tightened. On normal tents, tighten as much as you can. On inflatable tents, it’s possible to overtighten and bend the poles out of shape – moderately tight should be fine.
pick good pegs. Our favourites for the wind are delta pegs . We put a few on the key guy ropes of each tent. If you are using normal metal pegs, angle them into the ground – if they form a continuation of the line of your guy rope, they are the wrong way round, they need to be pointing in towards your tent and roughly forming a 90 degree angle with your guy rope. Especially if the ground is soft try to get the pegs all the way in. If you can get the hook bit down onto the ground it will help stop it spinning round and the guy rope breaking free. There are also various v-shaped pegs available which stop the pegs from doing this. A mallet is an essential tool for getting a tent up firmly. A peg-puller might also be needed to get it down again!
weight your tent down. You can also help your tents stability by thinking where you put your heavier items inside the tent. If the wind is tending to get under a particular corner, maybe that’s the location for your suitcase or coolbox or whatever other weighty items you have.
know your limits. If your camp arrangement becomes unsafe, be sensible about when you need to put the fire out or retreat to your car.
Hope you have a safe camp trip & don’t get blown away.
The camping season has begun and last weekend we tried out a new campsite called Stockbridge View . The overnight temperatures went down to -3 at the nearest weather station, although we suspect it might have been a bit colder in an exposed field at the top of a hill! In the morning we had to clear a thick layer of frost off our table and the water in our containers stayed frozen for quite a few hours (the eagle-eyed might spot the melting ice in th photo!).
We will wait until we’ve done another trip before properly reviewing the new sleeping bag – it was a bit of a extreme test. But we both slept reasonably well considering.
At one point on Saturday afternoon we had to shelter inside our tent because of a snow shower, but we were able to cook our dinner and breakfast by a fire to keep us warm. In the sunshine it was actually quite pleasant (as long as we were wrapped up!) and Stockbridge is an interesting little town to potter round with plenty of little gift shops to browse.
For more details on what we thought of the campsite see our review.
What are we up to this weekend? This morning we’ve had two snow showers – what lovely weather for camping! This isn’t an April fools joke…but perhaps we are April fools!! Will certainly be a good test of the new sleeping bag!
We’re at a new site, so we’ll let you know how we get on.
It’s become a running joke that this goat feels the cold at night. I always wear thermals to sleep in when I’m camping, even in the height of summer. At either end of the season you might find me wearing double thermals, a wool jumper, woolly socks, woolly hat and gloves inside two sleeping bags… and it’s not as if we camp in the artic, we rarely get further than Sussex!! And of course unless it’s a super warm night I insist on a hot water bottle…but you already know that top camping tip.
The reason it is so funny is that the other goat will probably just be in her summer jammas… but cocooned in her Western Mountaineering sleeping bag. It’s so super warm that she often she doesn’t bother to zip it up!
This season I’ve decided it was time for an upgrade! I compared lots of options and in the end went with Thermarest Questar 20. It seemed a good balance of good quality down, light weight and yet not as expensive as some.
When it arrived I couldn’t wait to go camping to try it out – so I decided that I would sleep in it at home on my bed. To test out whether it was warm I put aside my winter pyjamas and slept in a summer nightie.
At first I was a bit concerned, it’s so lightweight it didn’t feel snuggly warm, but about 4.30am I woke up because I was too hot!!
There are some good features which the websites don’t really tell you about:
The thing that annoyed me most about my old sleeping bag (mountain hard wear women’s lamina 20) was that the zip always got snagged on the lining. I’ve slept in it a lot over many years, and I’ve still not got the knack of how to stop it catching. But the thing that annoys me most is that when I bought it, the sales assistant specifically told me that it had a special tape to stop the zip catching!! Anyway, I’m more hopeful about the new one as it has two thick tapes and the zipper itself has a sheath over it.
I think the website details maybe did tell me about this feature, but I didn’t understand what it was. This is a photo of the inside bottom of the sleeping bag… a special little place to tuck your toes in to keep them warm!
Similarly the web details did say it was W.A.R.M…. this label shows what that means quite nicely!
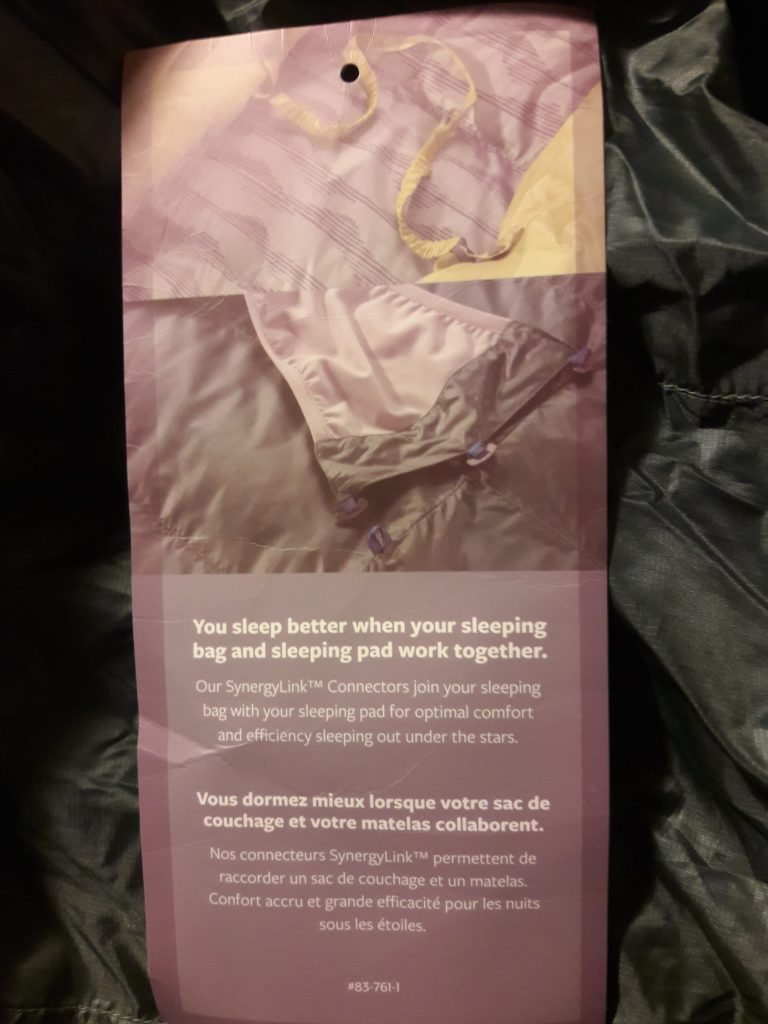
I was a bit confused why there were funny loops on the bag of the new sleeping bag – turns out it’s a way to keep the bag on your sleeping mat. Clearly I couldn’t test this out on my bed, but I’ll give it a go in the tent as it sounds a good idea.
I was also pleased to know that the down in the sleeping bag had been resourced responsibly and the ducks might have had a happy life. You can read more about it on the RDS website.
I’ll let you know how I get on when I test it out for real on a camping trip…hopefully some time soon!
L
PS this post was written last month (when it was still wintery) – sorry for the delay there was an issue with uploading the photos.