Second trip of the year for Nessie, but first for the two goats together, was to our old favourite Stoneywish campsite. We love it there – it’s easy to get to for us after work, the campsite is relaxed without to many rules and you can easily go for a walk on the downs or just mooch around the local village. Facilities are few, but fires are allowed!
We always enjoy people watching at Stoneywish, it’s a firm favourite with those living the van-life, so there are a wide variety of semi-permenant set ups, with people going to & from work, as well as families and groups of friends. Our favourite was when we happened to be there over Beltane and were pitched next to a group of witches – watching their ceremony was our evening entertainment, while we cooked our dinner in a cauldron over our own fire!
The neighbours we were people watching this trip had fairylights up… so not to be out done, we got ours up too!!
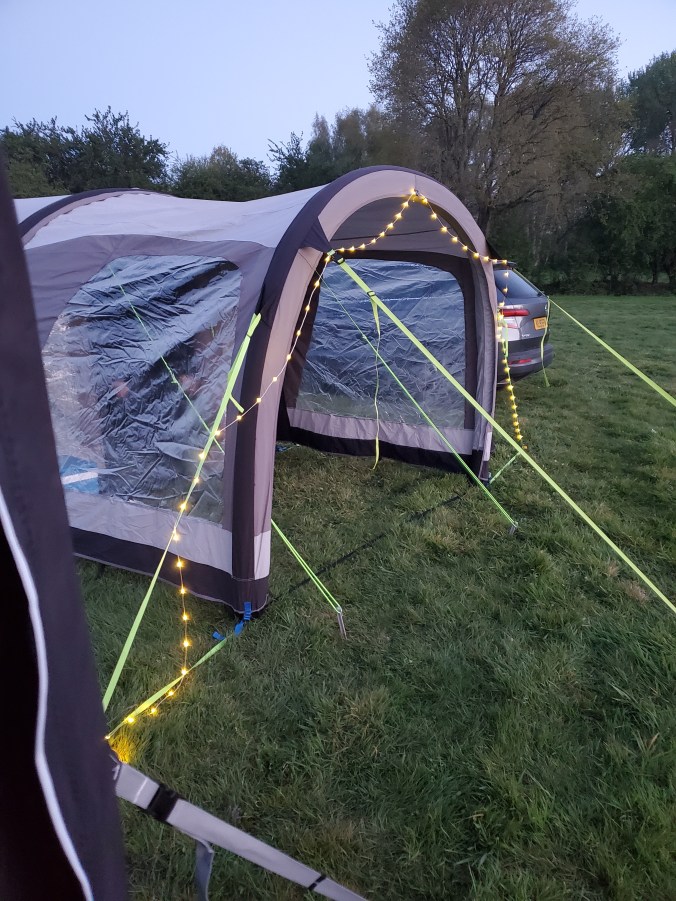
Fairylights are an excellant car camping accessory – not only do they make your pitch look magical, they are great for finding your way back to your tent in the dark. If you string them down the guy ropes, you can also help prevent people tripping over them – a hazard that can be genuinely dangerous as one of our friends discovered a few years back.
We had two sets of fairy lights with us, both of which are solar powered and both of which wind into their own little round plastic case making them suitable for outdoor use. Both sets were gifts, so I can’t actually post you links to either as I don’t know where they came from! The ones in the photo are very pretty and will also do different colours, if that’s your thing. The others have just a few lights, but you can turn them up so brightly that I can happily cook by the light of them under our gazebo.
An extra bonus of our stays at Stoneywish is that we are often joined by a local friend for a meal over our campfire. It’s quite fun to ‘host’. This time we cooked up Martin’s cheesy balls, spaghetti bolognaise and chocolate brownie pudding with chocolate custard.
Stoneywish has a nature reserve, but we’ve still never been to it!! This time we walked up the south downs and turned left, coming across the pleasant surprise of the pink pit stop – a drinks van with a customer portaloo! We then came back down through the agricultural college where we had our packed lunch in the churchyard and then back through the woods where we were treated to a wonderful display of bluebells. We had to get some good steps in as we were training for Isaacs Tea Trail in Northumberland… but more of that in due course!
L & R
PS thanks to our friend who has already replied and sent me a link to the fairylight birthday gift!