The new camping season has arrived! So we thought it was time to try a new campsite – Sussex Topiary Campsite near Horsham.
The first question when we arrived is where is the topiary? There are trees, but we couldn’t see any pretty shaped ones! The second question was where’s Reception?! The first place we tried turned out to be a derelict shed! Turns out there’s a house amongst the static caravans that’s the Reception.
We arrived on a sunny day, but it had rained all week so the camping field was very boggy. Instead we were given a hard standing pitch.
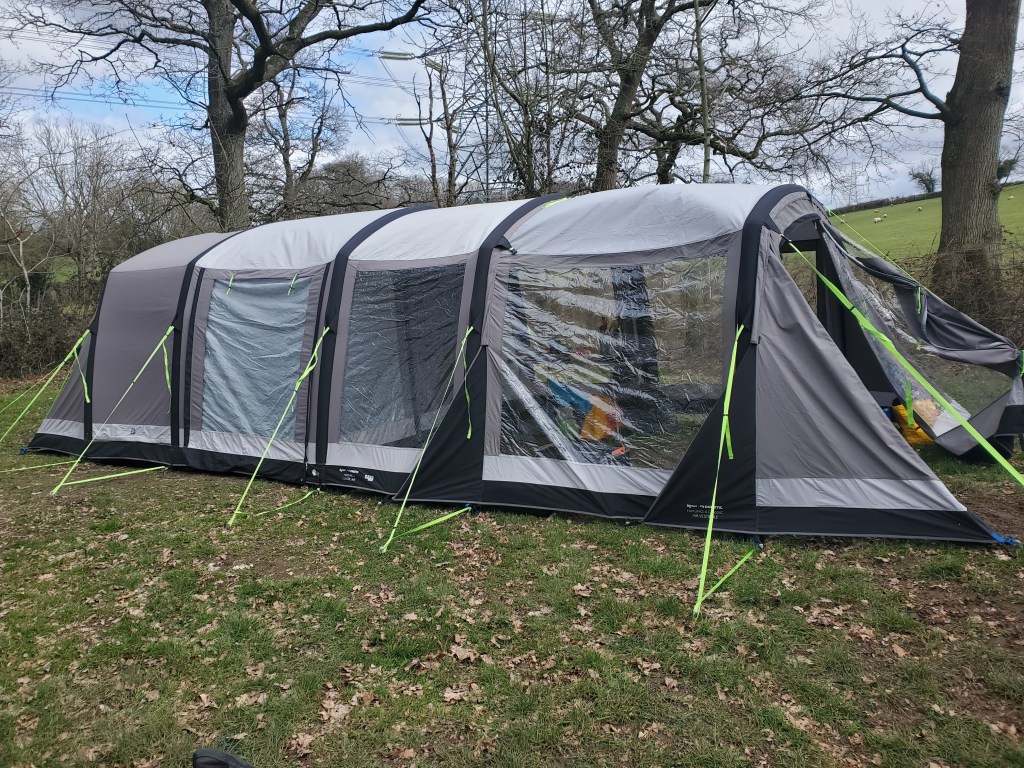
The hard standing pitch was gravel and it was good as it meant we didn’t get muddy. However, we don’t have any hard standing pegs! We made do with what we had, but it was hard work to hammer them in with the mallet… and once they were in they didn’t necessarily stay there! When hammering the plastic pegs from our Kampa tent (AKA Alice) I managed to split one of them in two right down the middle!!
Needless to say we were the only tent on the site! There were half a dozen caravans who looked like they might be fairlly long-term residents. The caravan next to us had a good set up with a nice awning. Our neighbours on the other side weren’t doing so well & had keeled over!!
We didn’t use all of Alice’s humps, just the maim tent & the vestibule door. But we were still able to have a bedroom each, a palatial en suite in the middle hump and a kitchen area in the vestibule. The vestibule was just big enough for a kitchen table with our stove, two chairs & a coffee table. It was just as well, because it rained overnight & all the following morning!!

The site is well located to access footpaths so on the Saturday afternoon (when it wasn’t raining) we went for a walk to build our appetite for dinner. The Downs Link path is nearby and is a good path using what looks like an old railway track. Sadly the track back to the campsite wasn’t so good. A bit muddy, turned to very muddy…and then to completely flooded quagmire! There was no way I could get through in my walking shoes, but the other goat had her wellies on, so she sloshed through to look for alteratives. I thought she’d disappeared completely, but she eventually reappeared having found an alternative route – through a field & over an electric fence!!!
Sunday morning we hunkered down in tent waiting for the rain to stop and enjoying the slower pace of life that camping enforces. When the rain stopped we moved to sitting outside by a fire waiting for the tent to dry.
I was really pleased that even though Alice is made of fabric, she dried out pretty quickly. I’d packed towels so we we were able to wipe down the remaining wetness on her windows to pack her away. I bought her with a seperate footprint groundsheet so that means the bottom of the tent stays clean & dry for packing away.
Overall we feel much refreshed for our trip and excited that the camping season has returned. The campsite is in need of some TLC in terms of cleaning & upkeep, but has potential…we’ll share our scores soon.
R